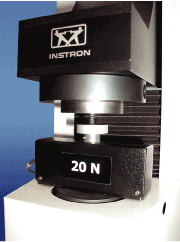
Virtually all spring manufacturers must test their products with some kind of load testing machine. Testing ensures that the product is produced and shipped within the customer's specifications. Or does it? Disputes over test results still occur that can cause a multitude of costly problems: returned product, delayed payment, product liability, or customer dissatisfaction. The quality of a spring testing program can largely affect these problems and their associated cost.

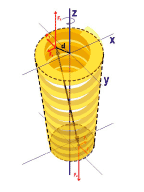
Spring manufacturers need to be aware of the unique loading conditions caused by springs. Due to a spring's coil design, it generates side loads and moments in addition to axial loads. The presence of these extraneous (non-axial) loads can cause significant errors in load readings. All load measurement systems are not created equal in this respect. Using a load cell system that minimizes these errors is essential. "Pancake" style strain-gauged load cells are typically more resistant to non-axial forces.
Spring testing professionals also need to ensure that the load cell being used is properly sized for the spring being tested. Modern load cell systems can normally be used from 1% to 100% of capacity with sufficient resolution and accuracy to generate repeatable results.

ASTM E4, Standard Practices for Force Verification of Testing Machines, is the governing standard for load calibration and verification in North America. Some general requirements of the standard include:
- Minimum load accuracy requirement of ±1% of reading;
- Verification of load is recommended at least annually.
The most common method to measure the length of a spring is to use the position of the frame crosshead. As the crosshead moves, its travel is tracked by either a linear or rotary encoder. Unfortunately, this method does not take into account the deflection of the load cell and the frame under testing conditions.
In most cases, when using equipment designed for spring testing, these deflections are small in relationship to the spring's deflection and behave in a linear fashion. Thus, the load-dependent deflection can be determined and the height corrected using adequate spring testing software and electronics.
Small displacement springs such as disc or wave springs may require more accurate height measurement. In such cases, a stiff frame and electronic compensation for deflection may not be enough. These applications typically require direct measurement of the distance between the compression plates using an auxiliary position transducer placed in the test space. This eliminates the need for height correction. With these devices, accuracies of ±1 μm can easily be achieved.
Spring testing fixtures normally include compression plates, tension devices, or special tooling designed for a specific type of spring. These fixtures can have a significant effect on the quality of the results. The fixtures may be a significant contributor to frame deflection. This is especially true for extension springs. Ensuring that test fixtures are installed when determining the frame deflection rate can reduce errors.
The compression plates on a spring tester also need to be flat and parallel. This prevents deviation in height if the spring is not placed in the same position on the plate for each test, and also eliminates errors that may be caused by uneven loading.
Spring testing is not always as easy as it sounds. Several key factors are critical to measuring load and height accurately and getting meaningful test results. The items discussed here cover just a few of the important features of an accurate spring testing machine. There are many other features that can affect accuracy, convenience, and efficiency. A good testing program can ensure that one is shipping quality product with respect to spring specifications.
This work was done by Chris Wilson, Product Manager, and Patty Hartzell, Assistant Product Manager, at Instron Corporation. To access the complete paper on accurate spring testing, visit: www.instron.com .

